
Last year at this time I embarked on an interesting journey. What I thought was going to be a two year expat experience in the Philippines became a 35 day diversion. Needless to say, a time of re-examination and reflection.
Before I left, I bought another Alabama Chanin DIY kit, and some extra yardage so I could get creative during my time away from home. I chose the DIY Magdelena Baby Doll dress in tone-on-tone natural and six yards of natural lightweight cotton jersey. I had bought the A. Chanin cropped cardigan in natural during a sale several months before and I knew I wanted something light and easy to wear underneath. The Baby Doll dress seemed like it was just the thing for those hot days hanging out by the equator.

During my time and travels on this journey I had a good amount of time to do the stitching on this project. I love the gold paint AC used with the stencil and this was my first time using the negative reverse applique method. That is where you cut away the non-stenciled fabric rather then the stenciled. It makes the pattern look more like the shapes were sewn on, rather then cut away. It gives the garment more texture.


Once the stitching was finished and I was ready to start constructing the garment, I was in a bit of a mid-life crisis (thats what all the reflecting will do for you). I’m turning 50 in 2016 and I just wasn’t sure the Baby Doll was the way to go for my age. I started thinking, what if I hijacked this project and turned it into separates. I did a mock-up of each way, played around with it, and took a bunch of pictures of both options. I even went so far as to post the pictures on Instagram @smmczyk and put the question to the AC community. It was reassuring to get opinions from friends and fellow makers alike. With some encouragement, I decided to go rouge on this project.

I cut some of the extra yardage I bought and pinned it on to the top portion of the dress. I first cut it the same width as the bottom the dress came with but I found that was a bit too much gathering so I narrowed it up a bit. I played around with the gathering quite a bit redoing it at least five times. This was my first time attempting the hand sewn gathering method. I first pinned in, then basted it, and finally sewed it together using the cretan stitch. I also played with the length of the shirt and decided I wanted it to cover the rear area, if you know what I mean.
The skirt took a lot longer to decide how to tackle. The panels I stitched were truly just two rectangles. After much hemming and hawing, and lamenting that I was going to be cutting off quite a bit of the stitch work I had done, I decided that the mid-length fitted skirt would be a good choice. My gut wanted a pencil skirt but that would mean cutting up to 25% of my stitch-work off and I just wasn’t able to do that. So, with some tweaking (my panels didn’t reach the full amount of yardage necessary to fit the pattern so I made the skirt just a bit shorter, I’m not even 5’6” for goodness sake), I took it in a bit on the sides. I also had to fudge a little on the grain line and as you can see from the pictures, my pattern was now going to be opposite directions on the adjoining panels. Good thing the Magdelena stencil is somewhat random or this would have never worked.


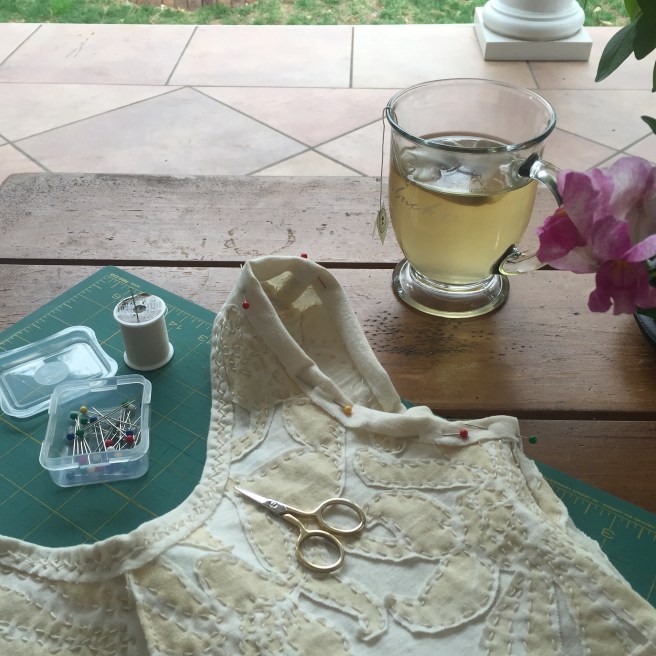
The highlight of this project. I posted a picture of my sewing the binding on the neckline of the top on my new Instagram account and I hash tagged #theschoolofmaking. A couple of weeks later I’m reading the daily blog post from Alabama Chanin talking about the School of Making’s instagram account and after a minute or two I notice one of my post’s in their collage. Mine is the small picture with the tea and scissors. Wow, it was such an honor to be able to contribute and have this organization that I respect recognize my work.

Here’s my picture up close – and yes, it is a bit staged. I really was out on the porch stitching and drinking tea, but I did have to pull the flowers over to make sure they got in the shot.
I really like the way it turned out and I especially like that I can wear the pieces together or separate. I think I’m going to get a lot more use out of the pieces this way


Here I am wearing my new separates on Mother’s Day. So happy to be wearing something I made and to be with my Mom!

Okay, so our faces don’t look that happy but if you read my MeMadeMay Week 1 post you know why.

One thought on “DIY Hijacked”