
I’ve been wanting to make the Market Bag (from page 107 of Alabama Studio Style) ever since I ordered this book back in 2010 based on a book review in the Wall Street Journal. It just seemed like the perfect use for all those T shirts we acquire over time.
Caution – political rant coming next: Do we really need a T shirt for every event, cause, or game? If you’ve ever seen the pictures of waste clothing you probably agree that we as a society are creating too much stuff! Seriously, google “clothing waste” images – you’ll be shocked.

In order to reuse some of that stuff, someday I would love to create a whole line of bags using old T Shirts, maybe as gifts for friends, to use as my grocery bags, etc. But, I had to figure out how to make them first and although Studio Style talks about the bags and gives dimensions, it doesn’t say much about construction. You wouldn’t think there would be much to it, a couple of straight seams, but for a self taught sewer like myself, there were still several lessons to learn.
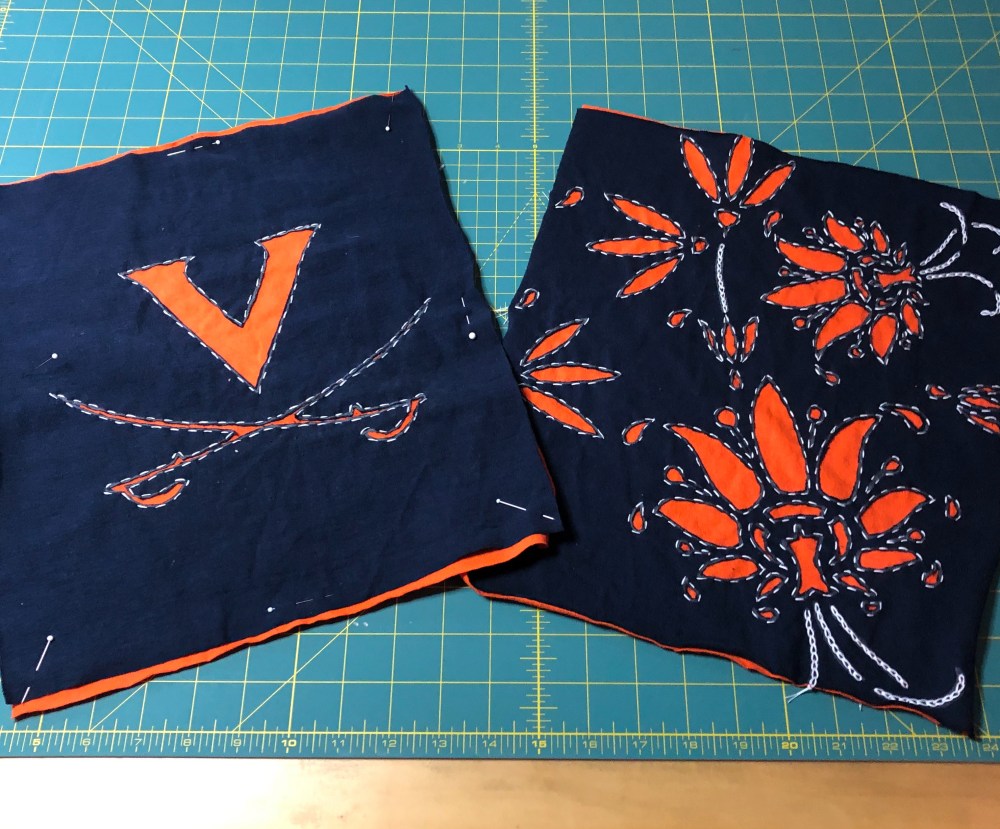
Of course, with March Madness coming up, and my large stash of collegiate T Shirts, I couldn’t help but think a UVA bag would be a great place to start. Who doesn’t love navy and orange! Creating the two large panels was easy enough. I used a silver sharpie to stencil Angie’s Falls on the one panel and a copy of the UVA logo on the other. I stitched around the outline using a running stitch. I started out with navy thread but it was a little too subtle so I switched to white. At this stage I wasn’t sure about the white either because it had a little too much contrast but it grew on me as I constructed the bag. The flower stems are chained stitched because they were so skinny.

In the Alabama Chanin example I have always coveted the design with the contrasting piping and I thought this would be a great time to use (and teach myself) that technique. I know there are commercial piping options out there but for my purposes I wanted to stick strictly to the T Shirt materials. After all, this is about using up old stuff, not buying new stuff.
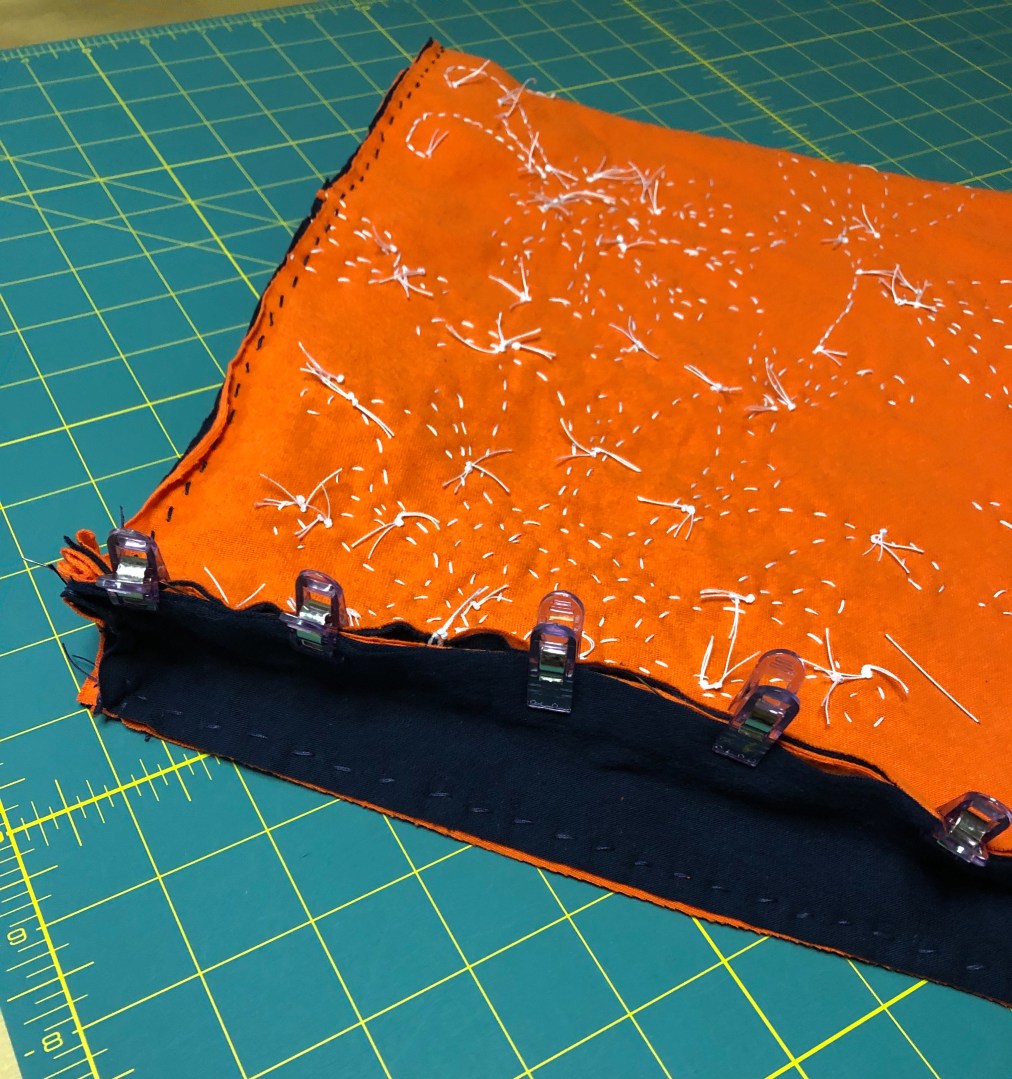
So I cut a one inch strip, folded it in half and pinned it between my front and side layers before I stitched them together.

Then I stitched on the sides and the bottom.

I pinned in another layer for the piping and attached the back panel.
Then it came time to think about the straps. When I did my initial cutting, I simply cut the size that AC said in the book, but I quickly realized these straps were going to be too small to be able to wear the tote over my shoulder. Also at this point I wasn’t planning on lining the bag, although it is suggested you do so in the book. This was just going to be my trial run.

I knew I wanted longer straps so I threw the question out there to the Facebook Stitch-A-Long group. I got some really great advice and my big take aways were:
- The easiest way to create strength and stability would be to add a woven fabric such as grosgrain ribbon
- In order to get a clean finish on the top I really should use at least a facing if not a whole liner
- It would be best to attach the straps under said facing
I decided to heed some of their excellent advice and I was going to try and give facing a try.

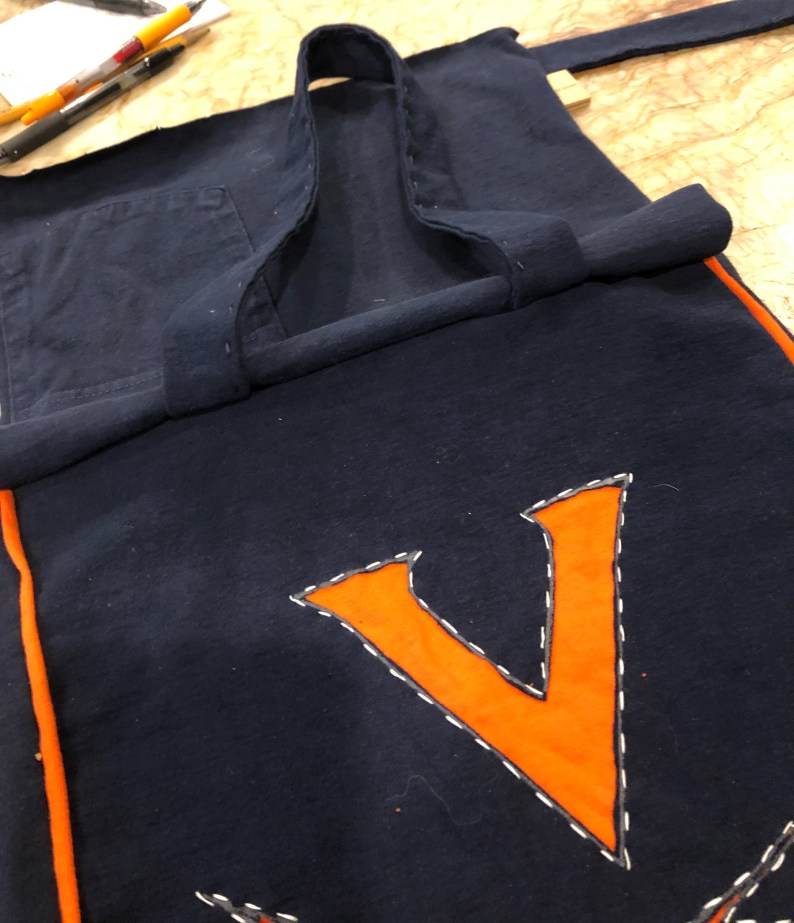
I recut the straps to about 26″ long. I folded the strap in half right sides together, sewed down one side, then turned the tube right side and top stitched. You can’t tell but the piece of navy fabric in the picture above has a pocket on it – I thought that would be fun to use in my facing. I’m always looking for a place to stow my keys/phone/lipstick.

I wanted to make sure the new strap length worked so I pinned them on.

And tested the length. Looking back now at this picture I kind of wish I had used orange for the facing/lining instead of the navy, but the navy had the pocket and more fabric.
Since sewing does not come naturally to me, it took me a few tries to make sure I had the straps pinned into place between the layers.

I stitched the end of the flaps down to the facing for extra strength. I hear that they will stretch out quite a bit. For my facing, I ended up cutting pieces and individually stitching each panel into place (next time I will probably sew it all together first – you’ll see why soon).
 After attaching the facing, which became more like a lining because I decided to cut the pieces long enough to go all the way down the panels to cover up my knots, I flipped it over to the right side and topstitched for a neat finish.

The only part I didn’t get “neat” was the piping. Here’s my biggest lesson learned – next time if I am going to add piping I am either going to sew together a full lining before I add it, or I am going to make the piping strips about 1″ longer than the sides so I can stitch them down. If you have a better suggestion, please let me know in the comments.

I decided after the fact to go back and stitch my facing/lining pieces together inside the bag. No one needs a bunch of material flapping around in their bag!

When all is said and done, I’m calling it a good first try.

This really was a fun, easy and quick project. It would be a great way to dip your toes in the hand-stitching waters. If you need inspiration for some other examples of Market Bags check out my Pinterest Board. The possibilities really are endless.
If you are in RVA, feel free to grab a couple of old T shirts and join me in my studio and we can get you started. Every third Thursday is open stitch night. Or give me a call and I can meet you whenever it works for you.
And when March Madness starts, you know who I’ll be routing for…Go Hoos!

So cute!!! Show me how!!
LikeLike
Come visit and I will!
LikeLike
This is exactly what AC is all about! Using your creativity and organic materials together to make a “one of a kind” creation. I think there’s definitely a market for this Sue.
Question:
Could you just make the orange layer bigger, rather than add more for piping?
And I’m with Rose – when can we do a long workshop?
Cynthia
LikeLike
That’s an interesting idea about the piping. There’s one way to find out if it would work 🙂
LikeLike