
In the spirit of July, I started working on my flag quilt kit from Alabama Chanin. It’s a little overwhelming, around 150 panels, but I’m hoping I can get some friends to help!

The first panel I decided to tackle was panel “ZZ” – a 5″ x 16″ strip of Apple fabric with the facets stencil painted on in Alabama Red paint. If you need the paint recipe, you can find it here. I’m doing all the panels on the flag in reverse appliqué. I feel it would be best if they all have the same weight and thickness.
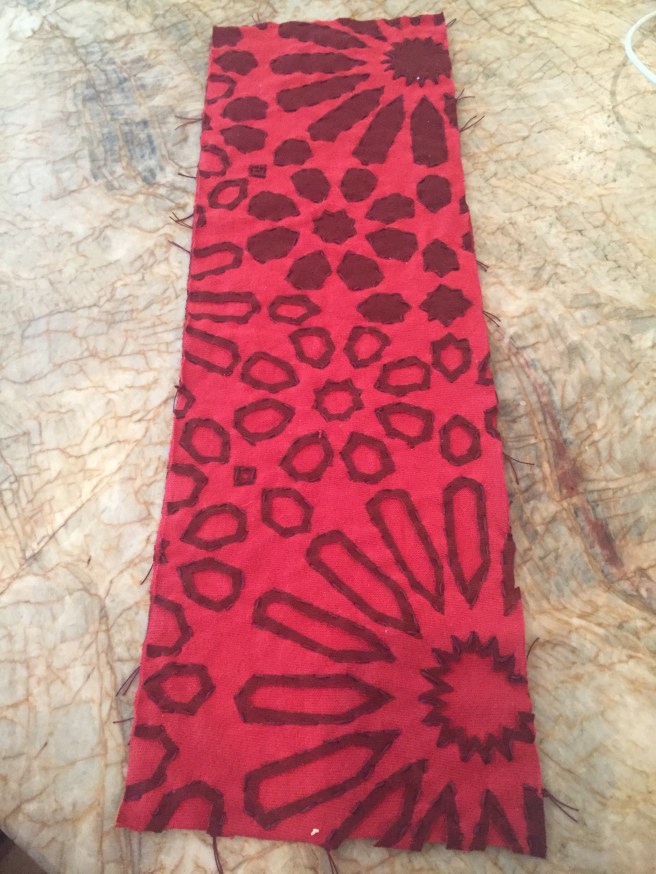
This was my second time working with the facets stencil and I have to say, “I love it!” Not just because it looks fantastic, but also because it is very meditative to stitch. It has geometric shapes with a lot of repetition so there is less effort to make stitch lengths the same and once you get in a rhythm, you know exactly where and how to stitch. Also, cutting it out is easier than most stenciled shapes as it is mostly straight lines. This was the same for both the reverse appliqué and the negative reverse appliqué.

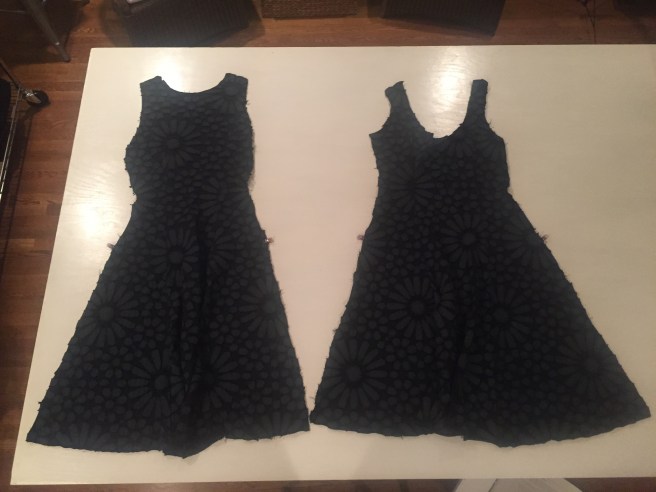
A few months back, I worked up a facets fitted dress in negative reverse appliqué from a DIY Kit I purchased at my Weekend Workshop last November. While you are at the workshop, everything you purchase is 20% off and I thought this dress would look great under my polka dot walking cape that was my workshop project.

The fitted dress they had for us to try on at the Factory was worked up in negative reverse appliqué and it looked so good I decided to do the exact same, including the same color, tone-on-tone navy with navy thread. Our Alabama Chanin guide, Rachel, was kind enough to have them cut me some pockets for me to add to the dress. Thank you Rachel!!

As I mentioned earlier, the ease of the geometric pattern made it fairly quick work to embroider the six panels of the fitted dress and then came the assembly. I had to go to Natalie’s book, Alabama Studio Sewing Patterns to read up on how to add the pockets.
Basically, after you’ve assembled the front and back panels..
Measure each panel to make sure the pockets are even on both the front and back and on each side…

Sew four separate pocket pieces to four separate sides…

Fell the pocket seams…

Pin the sides together and sew in one continuous line which includes the pockets.

And don’t forget to reinforce pockets stress points by tacking them.
I’ve been enjoying wearing this dress a lot!

So …. I’ve decided to order the facets stencil. Mostly because I’ve become so enamored with the flag quilt rectangle I’ve done. But also because today on Alabama Chanin’s journal post, they showed their wrap tunic pattern worked up several ways. I want to make a wrap tunic using the same color/technique as my flag rectangle because I think it would go great with some pieces I’ve already made. Here’s a look at what I was looking at.
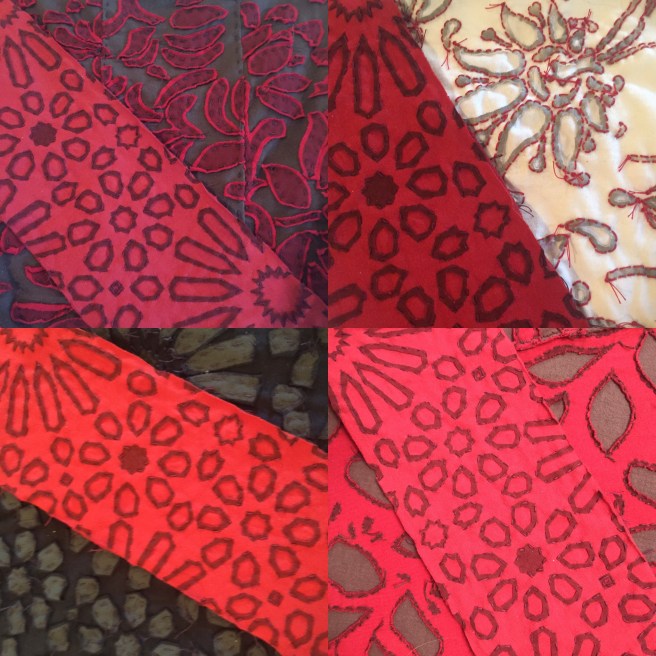
Funny how it can look so different in different lighting and with different backdrops.
Did you notice I didn’t cut out the one shape? I wanted to do a little something so you know it’s mine 🙂

Thankful I had facets for my first project. They really do work up quickly, I realize now that I’m trying the ‘magdalena’ stencil. Yikes. And I want to make a tunic too! It looks like a very forgiving piece on a woman’s figure 😉
Can’t wait to see that flag. It’s going to be magnificent.
LikeLike