
If you’ve read my blog or followed me on Instagram, you know that I am on a quest to make myself an all organic cotton hand sewn wardrobe. Thanks to Alabama Chanin, I’m getting closer everyday. But, most of the tops I’ve made have been sleeveless and the cold weather this year finally made me realize – it’s time to try a jacket.
Although I like the AC classic jacket pattern I have, I’ve never made it because when I tried it on at the Factory it didn’t have a lot of shape, and as I continue to lose mine, I need shape in my garments. Thankfully, Alabama Chanin came out with the Ezra pattern as a part of their 2018 Build-A-Wardrobe series.
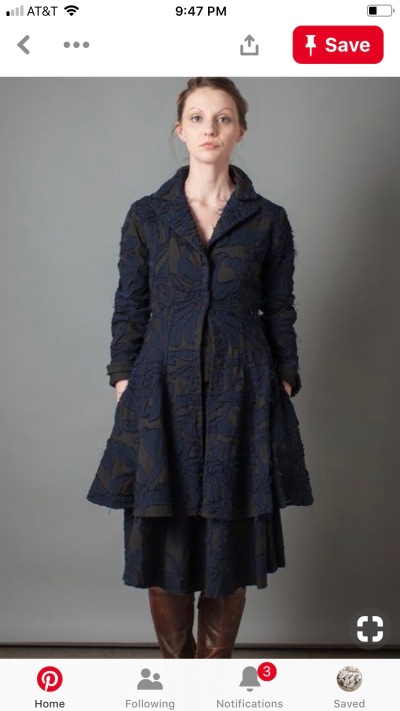
Then, this November, AC put an article on their journal, DIY Blazer Inspiration which had a picture of a black blazer with navy negative reverse appliqué in Magdalena stencil and that really inspired me (although I realized later these are not pictures of the Ezra, oh well.) I’ve been doing a lot of black and navy garments lately and have even put together a black and navy board on my Pinterest. It has this picture in it which looked like the Ezra (but probably isn’t because of the pocket placement):
Yep, that’s what I want to do, so, first things first, I ordered the Ezra pattern online from Alabama Chanin. I was so jazzed to start right then that I ordered the digital pattern and printed it off from my home computer. All 64 pages of it. Then I started to cut and paste the actual pattern.

This was the biggest challenge to me so far. I’ve never done much traditional sewing and this pattern has 12 pieces, 24 when you think about the two layers needed to do an embellishment. The instructions are 9 pages long with 17 steps. It’s got facing, pockets, a collar … this was not going to be easy (or quick!)

I had heard from the members of the Facebook Stitch-A-Long group that the sleeves ran really long – sure enough – so I cut them the same length as my bolero sleeve pattern. I crossed my fingers that it would work, especially since this was my first time doing a sleeve with two pieces.
I wanted my navy pieces to be a true navy and I don’t have any navy paint so I decided to just outline my stencil using a chalk pencil. This works with negative reverse appliqué because I stitched inside the shapes a little bit and cut away most of the chalking.

Actually, I kept my chalk pencil close during the whole project because sometimes when I had handled a piece quite a bit, the chalk would rub off, so I reapplied anytime it was starting to fade so I could see where to stitch.
Stitching and cutting the embellishment went pretty fast since the pattern pieces are all relatively small. I like projects like that where you can have lots of little successes. The flag quilt for example, when you look at the finished project it looks daunting but each small piece was a joy to stitch. I digress.
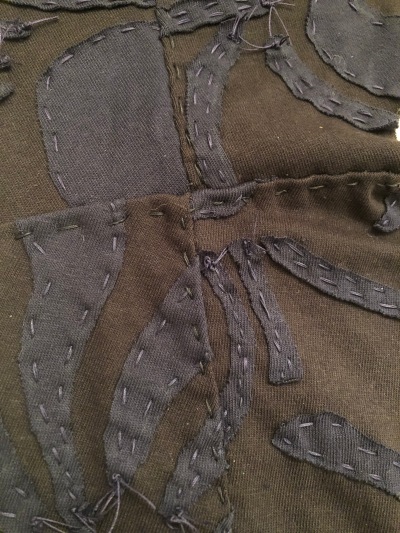
We start construction on step 7 with the pocket on the side front panel. Actually, this one panel ends up being in four pieces and I have to admit it took me a lot of puzzling to make sure I got it all lined up just right.

Sorry about the focus on this next picture but I think it shows how the four pieces of one panel fit together to make the pocket.

Then you stitch the bottom of the pocket together and baste the sides because the sides are going to be sealed when you sew your seams.

It’s at this point that I realize these seams are going to be about eight layers thick – yikes! Felling this is going to be a bear!

It’s crazy to think I only used one needle for this whole construction project but sure enough, it was really bent by the end.
Once I got the front and back panels stitched together, I had to try it on for fit. Phew – I was a little adventurous not doing a muslin first but thank goodness it worked out – I wanted to be able to wear this while it was still cold out.

Time to sew the shoulder seams together. Love it when the panels line up the way they are supposed to. I attribute this to Natalie’s “pinning to the middle”. You line up the edges and work from there – only here, after I lined up the edges, I lined up the seams, then pinned to the middle.
Next came the sleeves. Like I mentioned, the sleeves were in two pieces.


Assembling them was a breeze, attaching them not so much. It doesn’t help that I was trying to do it late one night after a long day, but sure enough, I sewed one on upside down and then the other ended up on the wrong arm.

After I started fresh again the next morning, I got them in where they are supposed to be. It looks pretty crazy at this point.

Next up, the side seams. Again, pinning to the middle and lining up the underarm seams were the key here.

Now the part I’ve been dreading, the collar. I’ve only ever done the collar on the walking cape before and that was much easier because it was just a matter of stitching it in while stitching the layers together. This was a different process, adding it on after the fact.

I have to admit, the instructions weren’t a great help to me here. I think I’m more of a learn by doing it type of person, and if I need to, take it out and do it again. Which I had to do for several things on this project. I’m hoping I did it right.
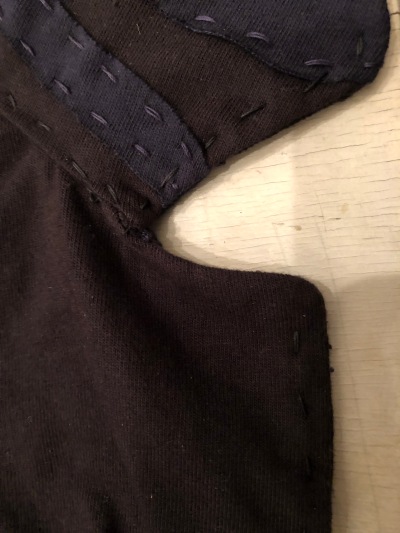
I didn’t get the cleanest connection where the collar meets the front panel but… If anyone has any tips on how to do this, let me know, I’m already thinking about what other colors I want in this pattern so I know I’ll be making it again. (Oh who am I kidding, ALL the colors!)
I still haven’t done steps 16 or 17, sew the pocket flaps and apply snaps, but I’m going to go ahead and start wearing it. Who knows, those steps may never happen. I will say though, I may try and go back and attach the facing on the front center panel with a quick stitch along the seam between the two front panels. Currently, it curls up and makes the jacket stick out a little.
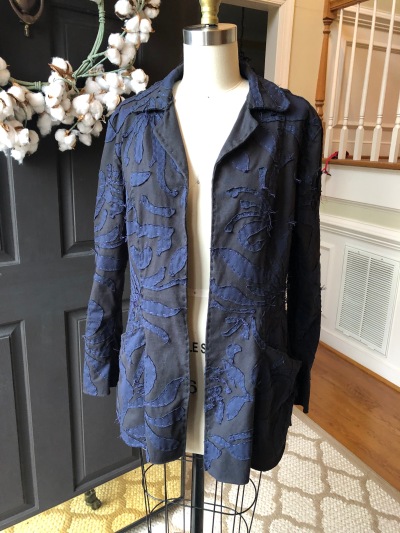
There is a bit extra in front since it’s supposed to overlap for the snaps. Not sure I’ll do them on the whole front (I need to learn crochet to learn how to cover the snaps), but I do want to at least do one right under the bust.

This picture shows where the pocket flap would hide the pocket opening. I kind of like that the backs of my pockets are in plain navy. Maybe I should have done the facing in navy too. That’s one of the things about these projects, there’s always a “what if I had done xxx.”

I’m so excited to wear it! It’s going to look great with jeans. And the sleeves turned out the perfect length!

FANTASTIC!!
LikeLike
It looks so good! I hope your second jacket is one J can follow along with – h would never be able to figure all of that out! Good job.
LikeLike
Absolutely, I would love to have you follow along. Actually, right now, I’m thinking an unembellished Blazer in White – I’ve always wanted a white blazer but never found the right one.
LikeLike